This is part of my “Pyre” world.
The Warriors’ District
Common Enemies: Ghosts and Zombies
Pyre needed its defenders. These warriors trained in many fighting styles, favoring hand-to-hand combat (since shamans could handle ranged fighting). Their halls contain many holograms endlessly re-enacting their stances and strikes.
Children who were not chosen as shamans were also considered for warriors. Because of the shamans’ criteria, the warriors tended to get more stubborn meatheads than the shamans. As a result, the warriors evolved a very strict and rigid culture of rigorous physical exercise and discipline.
Warriors prized inner strength, physical ability, and shrewdness in battle. Because Pyre was de facto ruler of the world for as long as it stood, warriors rarely concerned themselves with large-scale war strategies. They preferred to analyze specific battle tactics. They were most impressed by clever maneuvers on the battlefield.
Warriors also tended to look down on the shamans for relying on external rituals instead of inner strength.
Warriors all wore uniforms of various cool blues with white trim. The classic warrior uniform was a loose sleeveless shirt and loose pants, tied with a sash.
This district is crisscrossed with dozens of simple trenches and fortifications, besides its many (now ruined) training halls and barracks. The warriors depended on themselves, not traps, to hold back the invaders.
This had an interesting side effect. Humanoid constructs were rare in the warriors’ district, and offensive constructs were absolutely forbidden. So, roving constructs have never visited the warriors’ district. As a result, the many undead who arose here from the corpses of the warriors, wizards, and shifters have remained unmolested for centuries.
The Demonstration Halls
Most halls were built along the same lines: A long hallway, lined with statues and holograms, leads to a central training room that takes up most of the hall’s space. There are a number of small rooms off the main chamber, storing weapons, equipment, and training dummies. Huge windows, high on the walls, combine with skylights to bathe the rooms in light.
The Training Halls
These long, low buildings were used—surprisingly enough—as training grounds for the warriors. Different halls were used for different ages and types of warriors.
They consisted of two primary designs: a circular arena surrounded by high seats, and a long hallway, sometimes in a shape that wrapped around on itself.
In the arena design, warriors were pitted against each other, or simple but incredibly deadly constructs. Teenagers, for example, often fought spinning cylinders studded with long blades.
The hallways were designed as extended gauntlets. Spears shot from cubbyholes, blades of all kinds would appear out of tiny slots, and in general, dangers could attack from anywhere. Some of them even simulated urban combat, leading trainees into faux cellars and sewers.
The Gauntlet of Chains
This is a simple, room-by-room training hall. Upon entering, the door slams behind you, and the door on the opposite site does not open until you have defeated the room’s challenge.
Room One: Frenzy
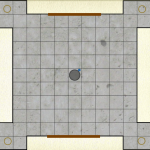
The first room is a simple square affair of stone block. In each corner floats a stone cylinder with a spherical red eye. In the center of the room is a three-meter-square raised stone platform, about two feet from the ground. Over the platform hang half a dozen chains that disappear into tiny holes in the ceiling. The exit door is adorned with carvings of three criss-crossed chains.
As soon as the entrance door closes, the cylinders come to life and fire bolts of force at the intruders. The cylinders cannot float onto the platform in the center of the room. The cylinders will avoid attacking any intruder that is already being attacked by another cylinder.
If three adventurers all pull on the chains during the same combat round, the cylinders cease fire and retreat to their corners, and the exit door opens.
Room Two: The Pit
In the center of this room is a pit three meters deep. On either side of the entrance door is a stone statue of a gargoyle-like humanoid holding long chains.
There are four silver keys scattered around the room, and each side wall holds two keyholes.
When the entrance door closes, the statues come alive and attack the intruders. The chains wrap around an individual (damaging them) and whip them into the pit (whereupon the intruder takes falling damage).
The adventurers must place all four keys into the keyholes. Once that’s done, the statues retreat to their original positions and the exit door opens.
For an optional extra challenge, each key is made of a different metal, and each lock is made of a corresponding metal, so the keys must be matched to their appropriate locks.
Room Three: Lightning Strikes
There are cubbyholes in each corner of this room. Each contains a metal ring floating parallel to the floor, within which runs a set of chains that disappear into the ceiling and floor. The chains are studded with small gems.
In the center of the room floats a large metal cylinder, through which further chains descend from the ceiling through holes in the floor. A thin silver ring runs around the center of the cylinder, about two meters off the floor, and on the silver ring is a cold blue orb.
When the entrance door closes, all the chains in the room begin moving up and down. Every other turn, the gems on the chains in the four cubbyholes align, and lightning bursts out, covering the appropriate quarter of the room.
Meanwhile, the blue orb aims at the nearest intruder and strikes him or her with lightning. The blue orb can only attack one creature per turn.
Destroying the metal rings in a cubbyhole will disable the lightning attacks from it, and the cylinder in the center can be disabled or attacked until it is destroyed.


![[Atom feed]](/user/themes/geek-archaeology/images/atom-feed.png)
![[RSS feed]](/user/themes/geek-archaeology/images/rss-feed.png)
![[iTunes podcast feed]](/user/themes/geek-archaeology/images/itunes-feed.png)